
About this blog
Let's start with the why part?
As a child, I was always fascinated by writing. While I was not the best, I always got great joy when connecting facts and events to tell a story. Looking back, I realise this was one of the few things I would do for myself as a kid. To write more, I would end up reading more, a lot more for a 12-year-old kid. Naturally, the more I began to focus on my career, the less I got to write for fun.
As I have grown in my career, I have realised the importance of a good narrative. The way you share your ideas is fundamental when leading a team or evolving into the role of the tech lead. Suddenly your audience goes from being 100% technical to a mix of engineers, product managers and business. It is essential to present a robust technical idea and present it so that everyone makes sense of it. While everyone is excited about the new concept, everyone is also looking at their benefit (I remember being in a conversation with a senior product manager where I was trying to explain the benefits of micro frontends, and I completely blew it because I could not explain what it meant for product). Now when I go into the meeting to propose a new idea, I always think of the famous Blind men and an elephant story (A folk tale from India that teaches intercultural awareness by illustrating how different perspectives lead to distinct points of view).
So I am starting this blog in an attempt to improve on my narrative (as I believe writing helps you streamline your thoughts), while also challenging myself to work on something which is a bit more than my regular job.
Moving on to how I setup this blog
Hosting
To start with any online blog, the first thing you have to decide is where you would like to host it. You can always use some of the existing hosting solutions such as Medium, dev.to (primarily technical writeups). Or you could always start with your own hosting as I have done here. If you are new to blogging, I would highly recommend going with something like Medium. Medium has an amazing editor and removes the burden of figuring out the tech details. To a certain extent, it also manages traffic to your blog by providing a global platform. If you choose Medium or other hosting platforms, you can skip the rest of the content.
If you want a bit of an adventure and start with a self-hosted blog, then the first thing you would need is a domain. I bought mine from google domains. I liked the admin area as it is very easy to setup custom name servers (I will talk about this later). You can also go for some other options, such as GoDaddy or Namecheap. (it does not matter which one you go forward with)
Content Creation and Organisation
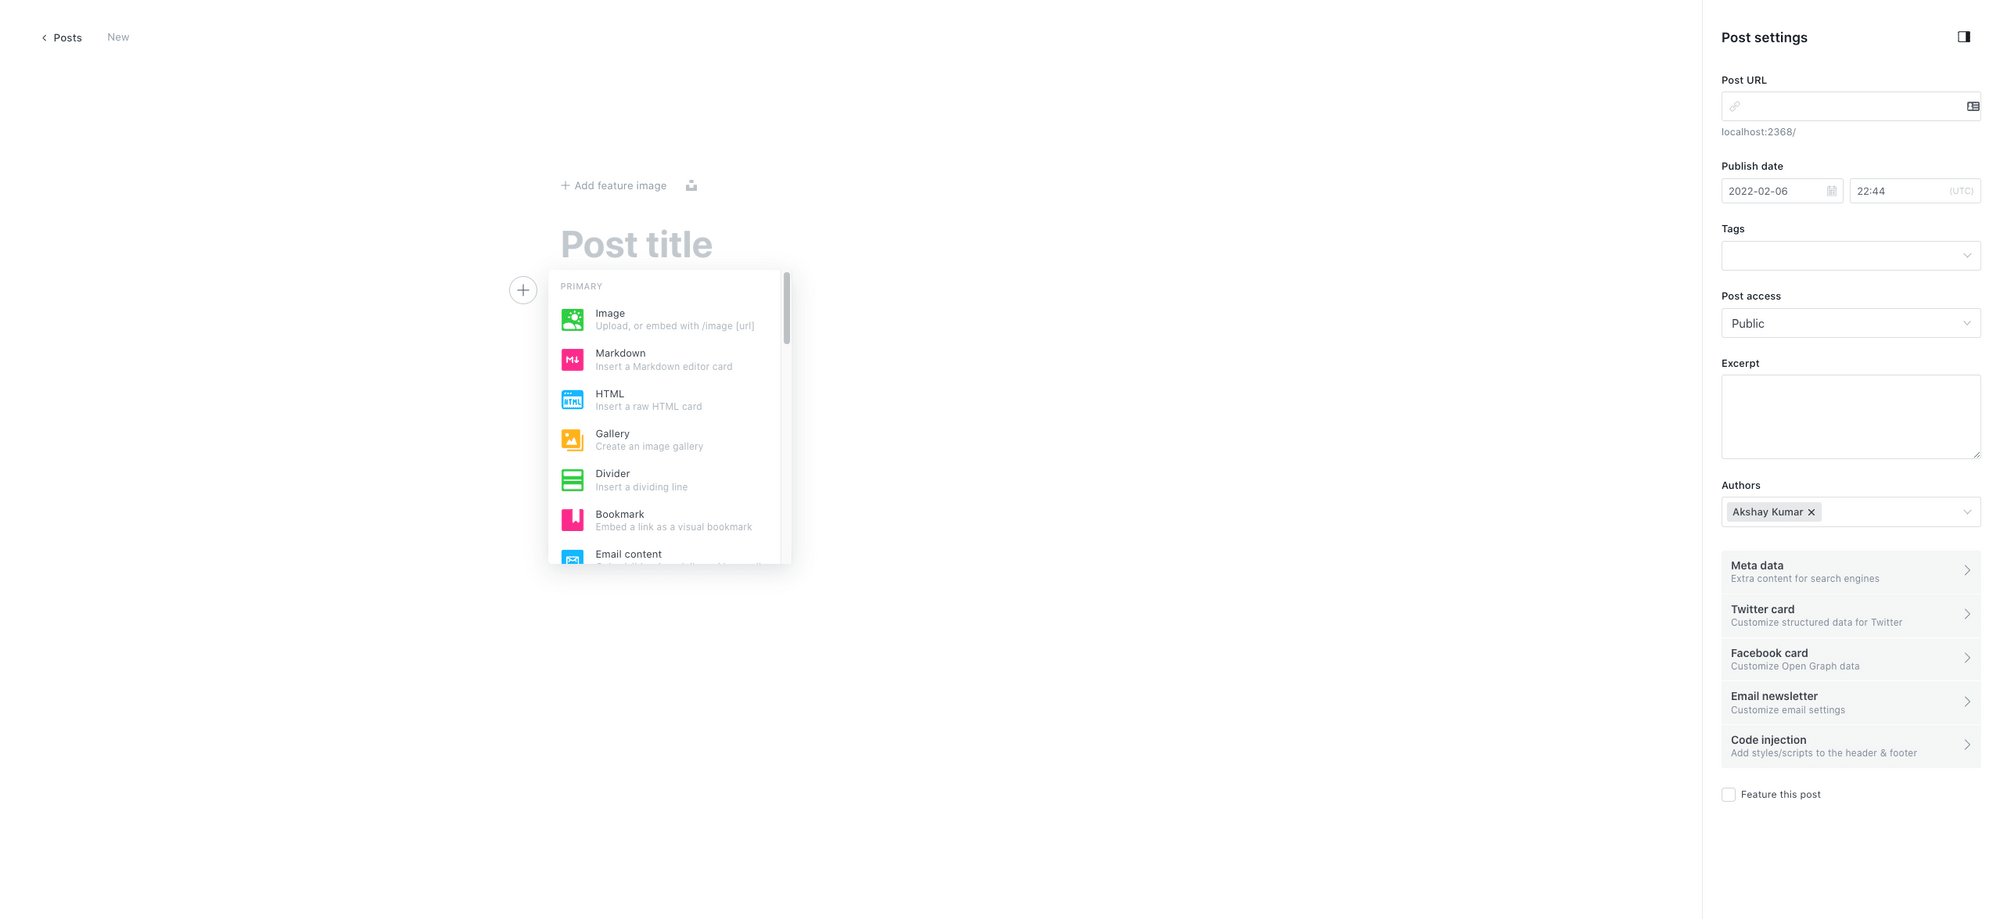
Now, this is where things get a bit interesting. We use something called a CMS (Content Management System) to write and organise content. While traditional CMS (such as WordPress, Joomla or Drupal) remain popular, there has been a shift in using a different way of fetching content called headless CMS (Ghost, Strapi, Contentful). I used Ghost as my CMS provider because of the capability it provides me with to scale my existing solution. I am also in love with its editor. It is simple to use (very similar to Medium's). An additional advantage is Ghost comes with a few handy themes, which you can also directly use. While Ghost also has an online hosted version (ghost pro), I chose to self-host Ghost instance on my mac. The reason for this approach was simply to be able to setup this blog without any overhead subscription fee. As I am very early into this writing journey, I was not comfortable paying the subscription fee every month, not knowing how long I would be writing.
Instructions to setup ghost installation on your local machine can be found here - https://ghost.org/docs/install/local/
For those interested in reading differences between headless and traditional CMS, can head over to this link.
Generating Static Website
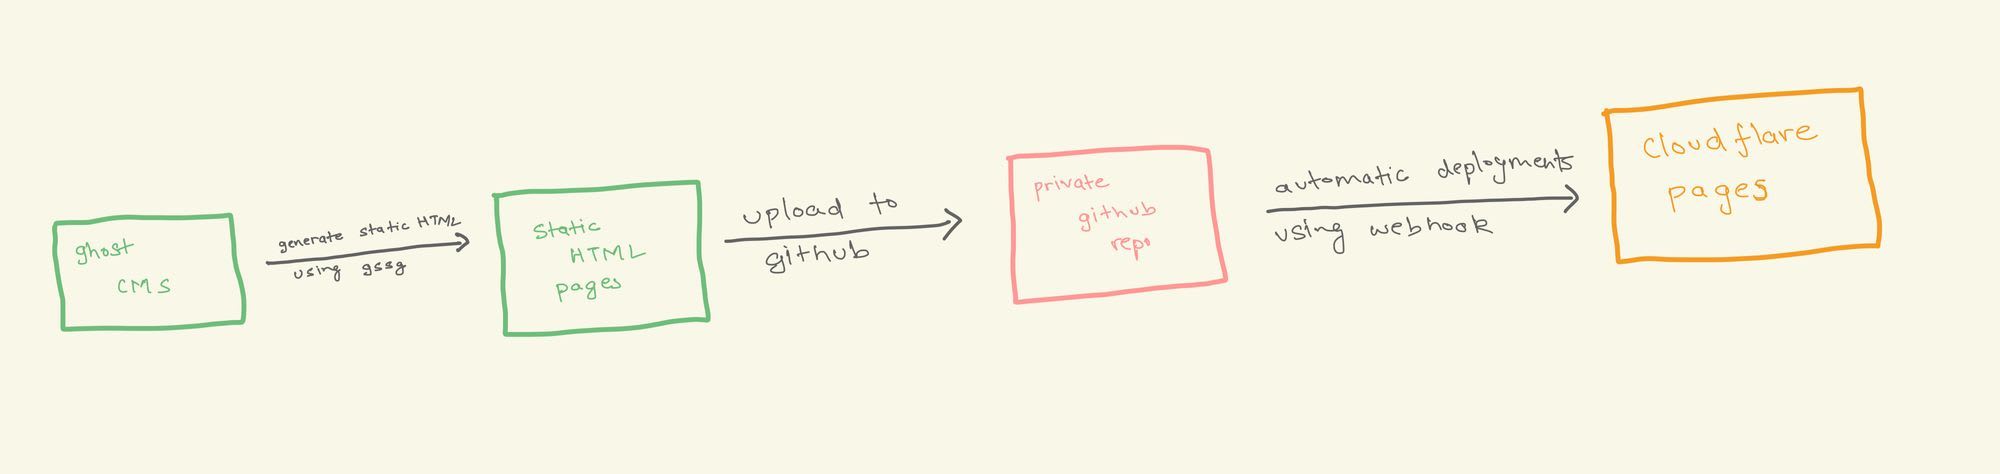
Now there are multiple approaches to serve the content. You can choose to host a server, render the content there, and provide it to users (like a full-fledged traditional website). However, I took the approach of converting the content to HTML on my machine and serving this static HTML to users using Cloudflare pages. This way, I do not have to bear the cost of maintaining servers and ensure that my pages are loaded fast for every visitor.
To convert my code to HTML, I use an open-source library called Ghost Static Site Generator. This content is then uploaded to a GitHub repo.
Serving the content to users
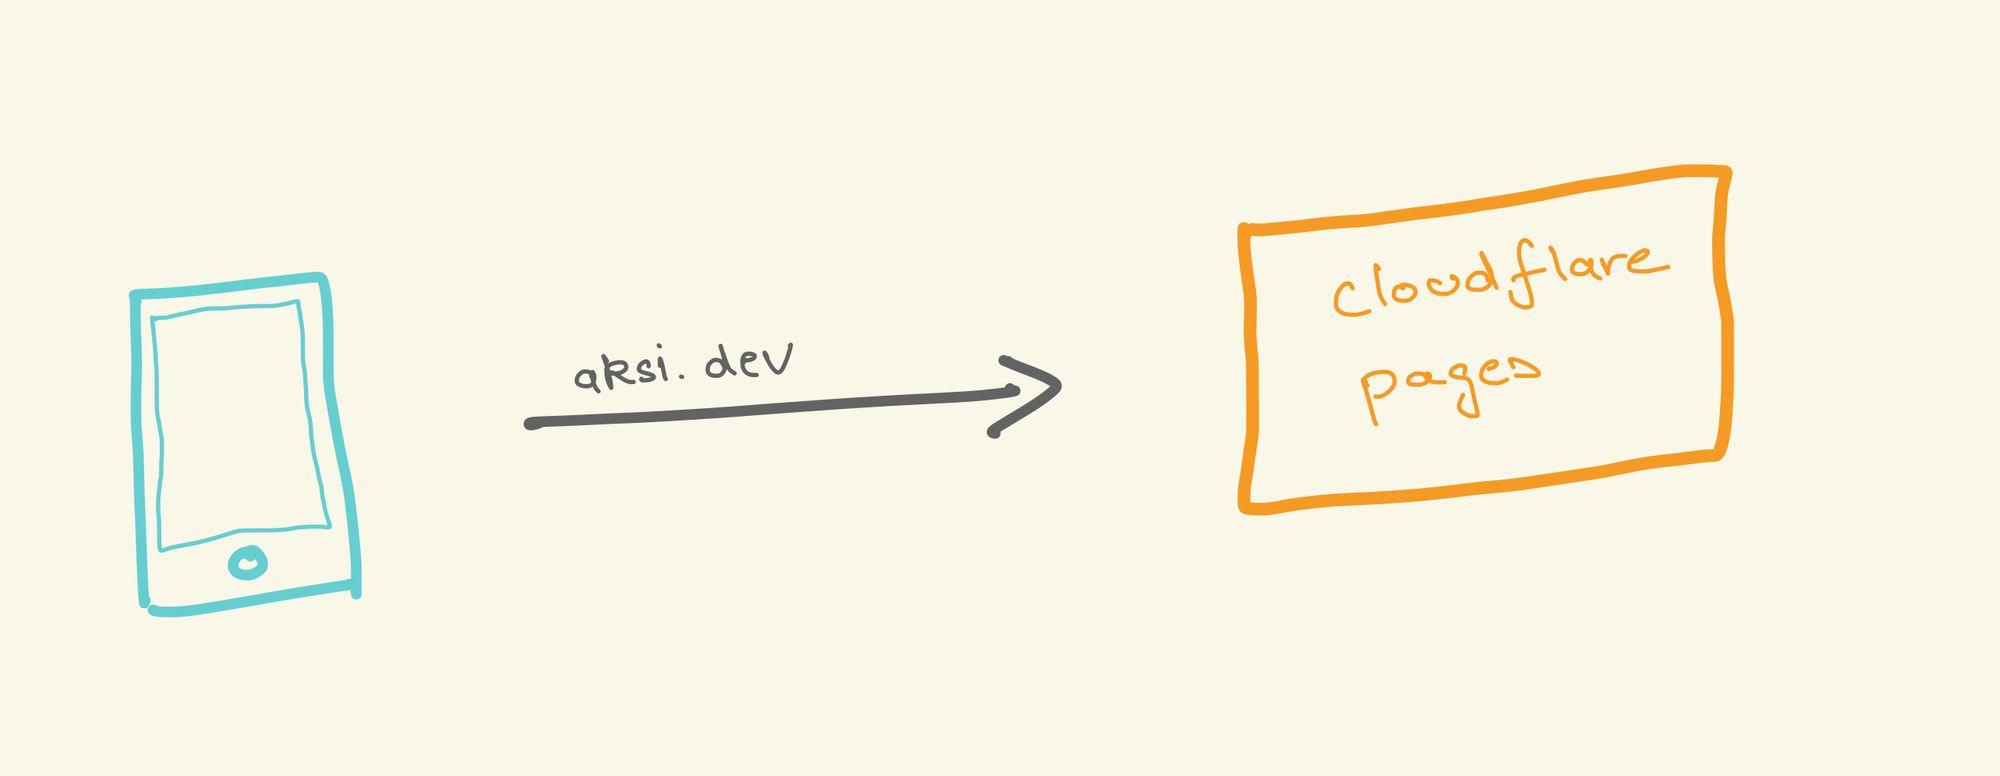
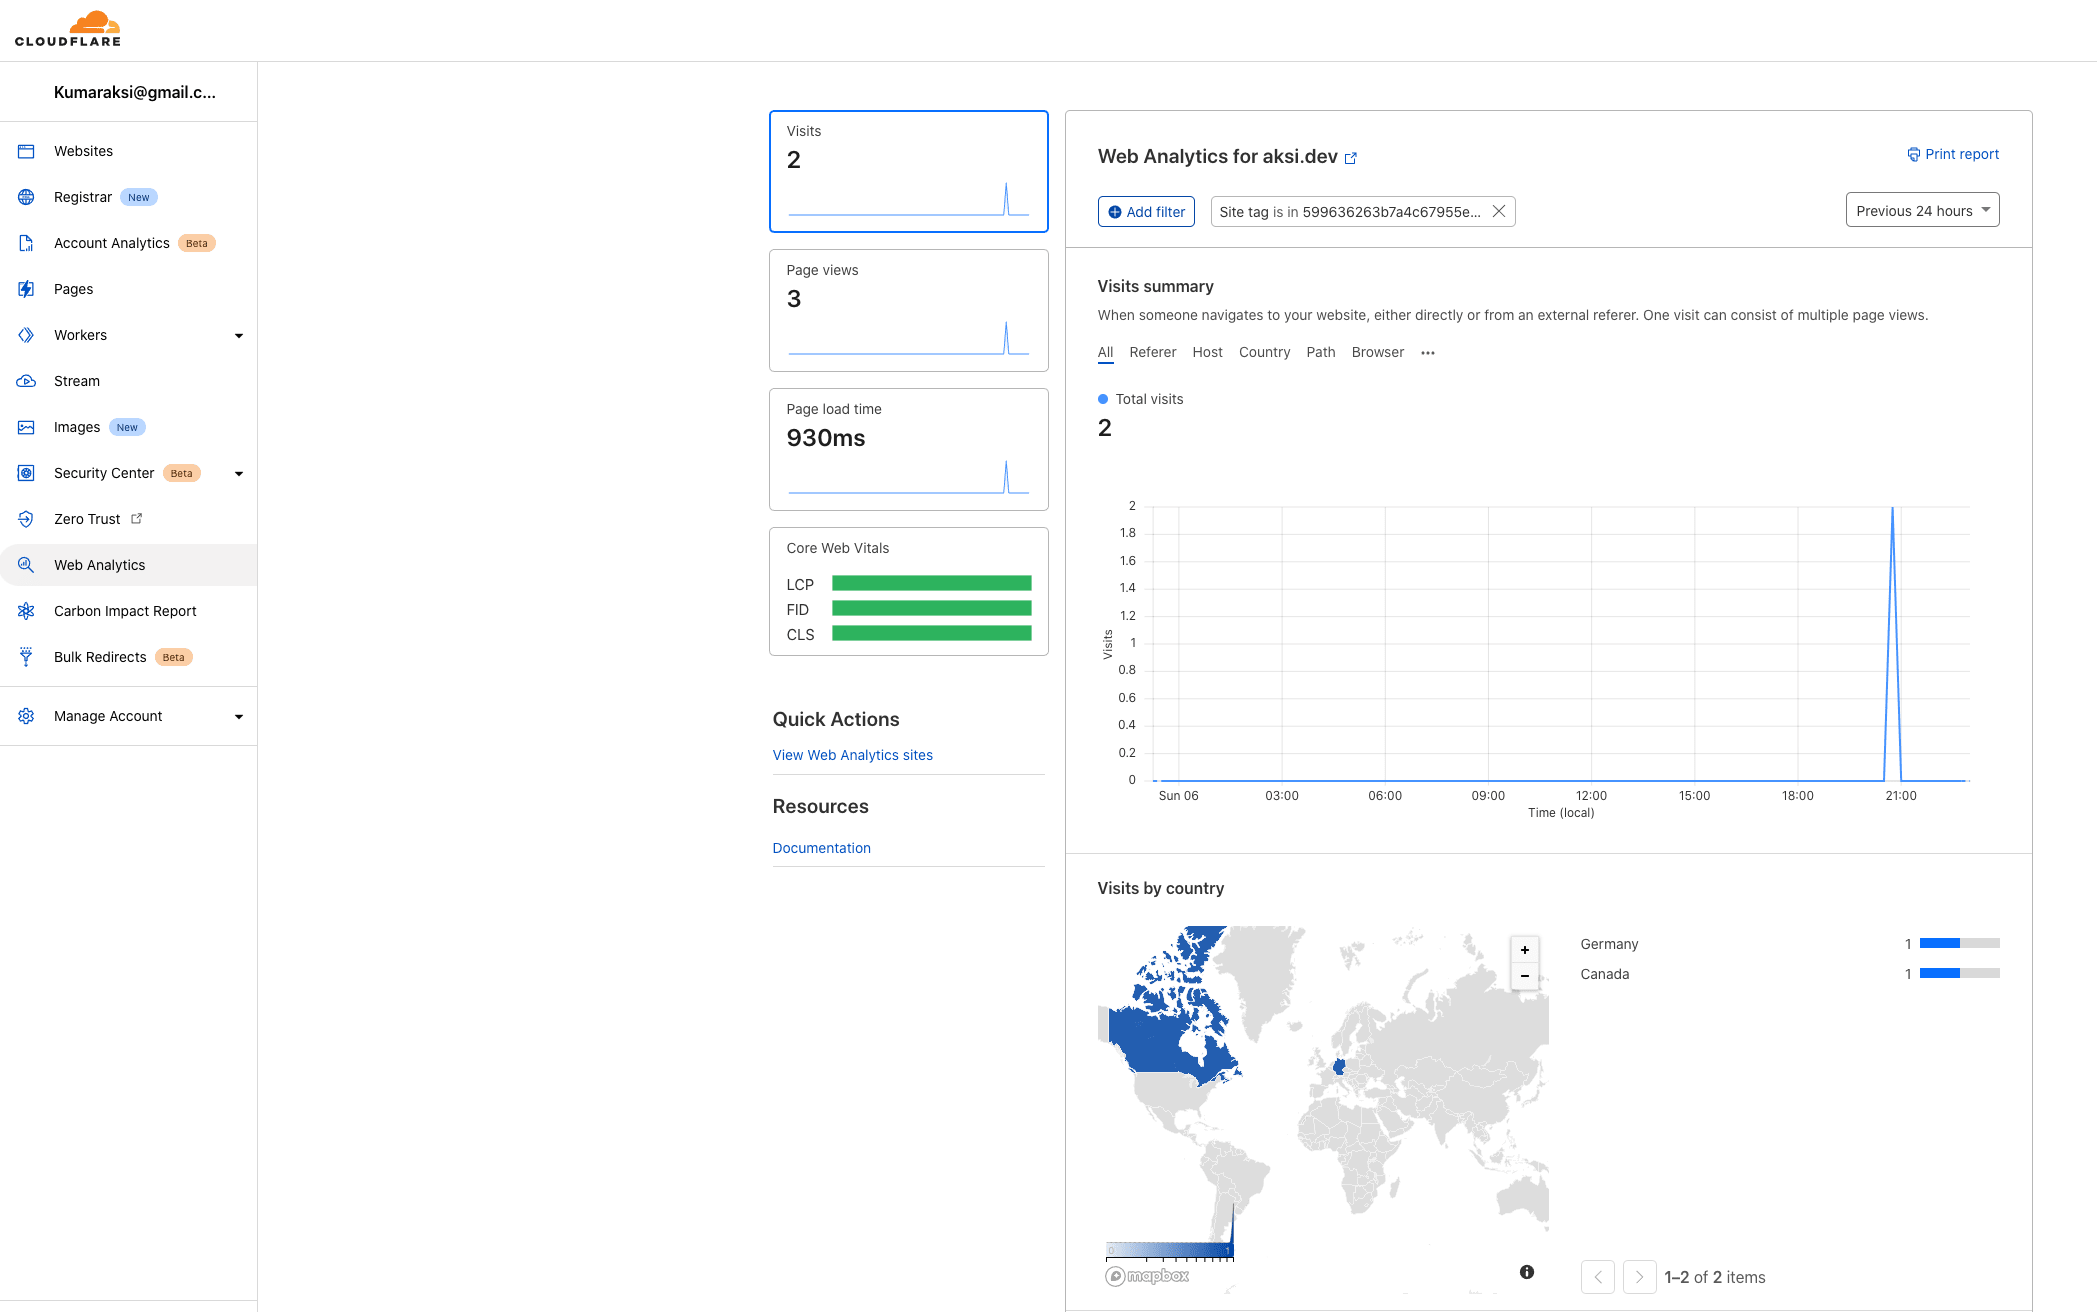
Now in order to serve the static content I am using cloudlflare pages. The reason for using cloudflare pages is that first of all its free for my use case. Second it provides basic analytics and DDOS protection for the website. In future if I decide to add more functionality to the website I would be able to do so using cloudflare edge functions (though at a slight cost)
In order to serve this, first you have to change the domain nameservers for your domain to cloudlflare. You can follow this guide for the steps - https://support.cloudflare.com/hc/en-us/articles/205195708-Changing-your-domain-nameservers-to-Cloudflare
This usually takes around 48 hours to complete. You will get an email from cloudflare once this is done.
Next I connected the cloudlfare page to my github repo where I was uploading the content. Every time I make a push to the github repo, cloudflare pages automatically trigger a new deployment. You can read more about it in detail here - https://developers.cloudflare.com/pages/framework-guides/deploy-anything
Finally to what I plan to write
To be honest I have not really thought about this a lot. There will definitely, be some technical content. However I also plan to write a bit about my own experiences and what were the learnings. I have been a lot inspired by Ozan Varol, and how he narrates his experiences and observations. So lets see where this journey takes me!